Inception of a portfolio
Date: 2021
Portfolio

Building an online portfolio is a must for any professional working in IT, especially for Designers. For a UX designer as myself, it's really important to showcase your skills with explanatory case studies and concise copywriting.
To be honest, building an online portfolio scared the hell out of me. I was afraid of delivering a product that didn't reflect my skills to their true value. To overcome this stress, I've decided to plan this project as any other UX project I've worked on.
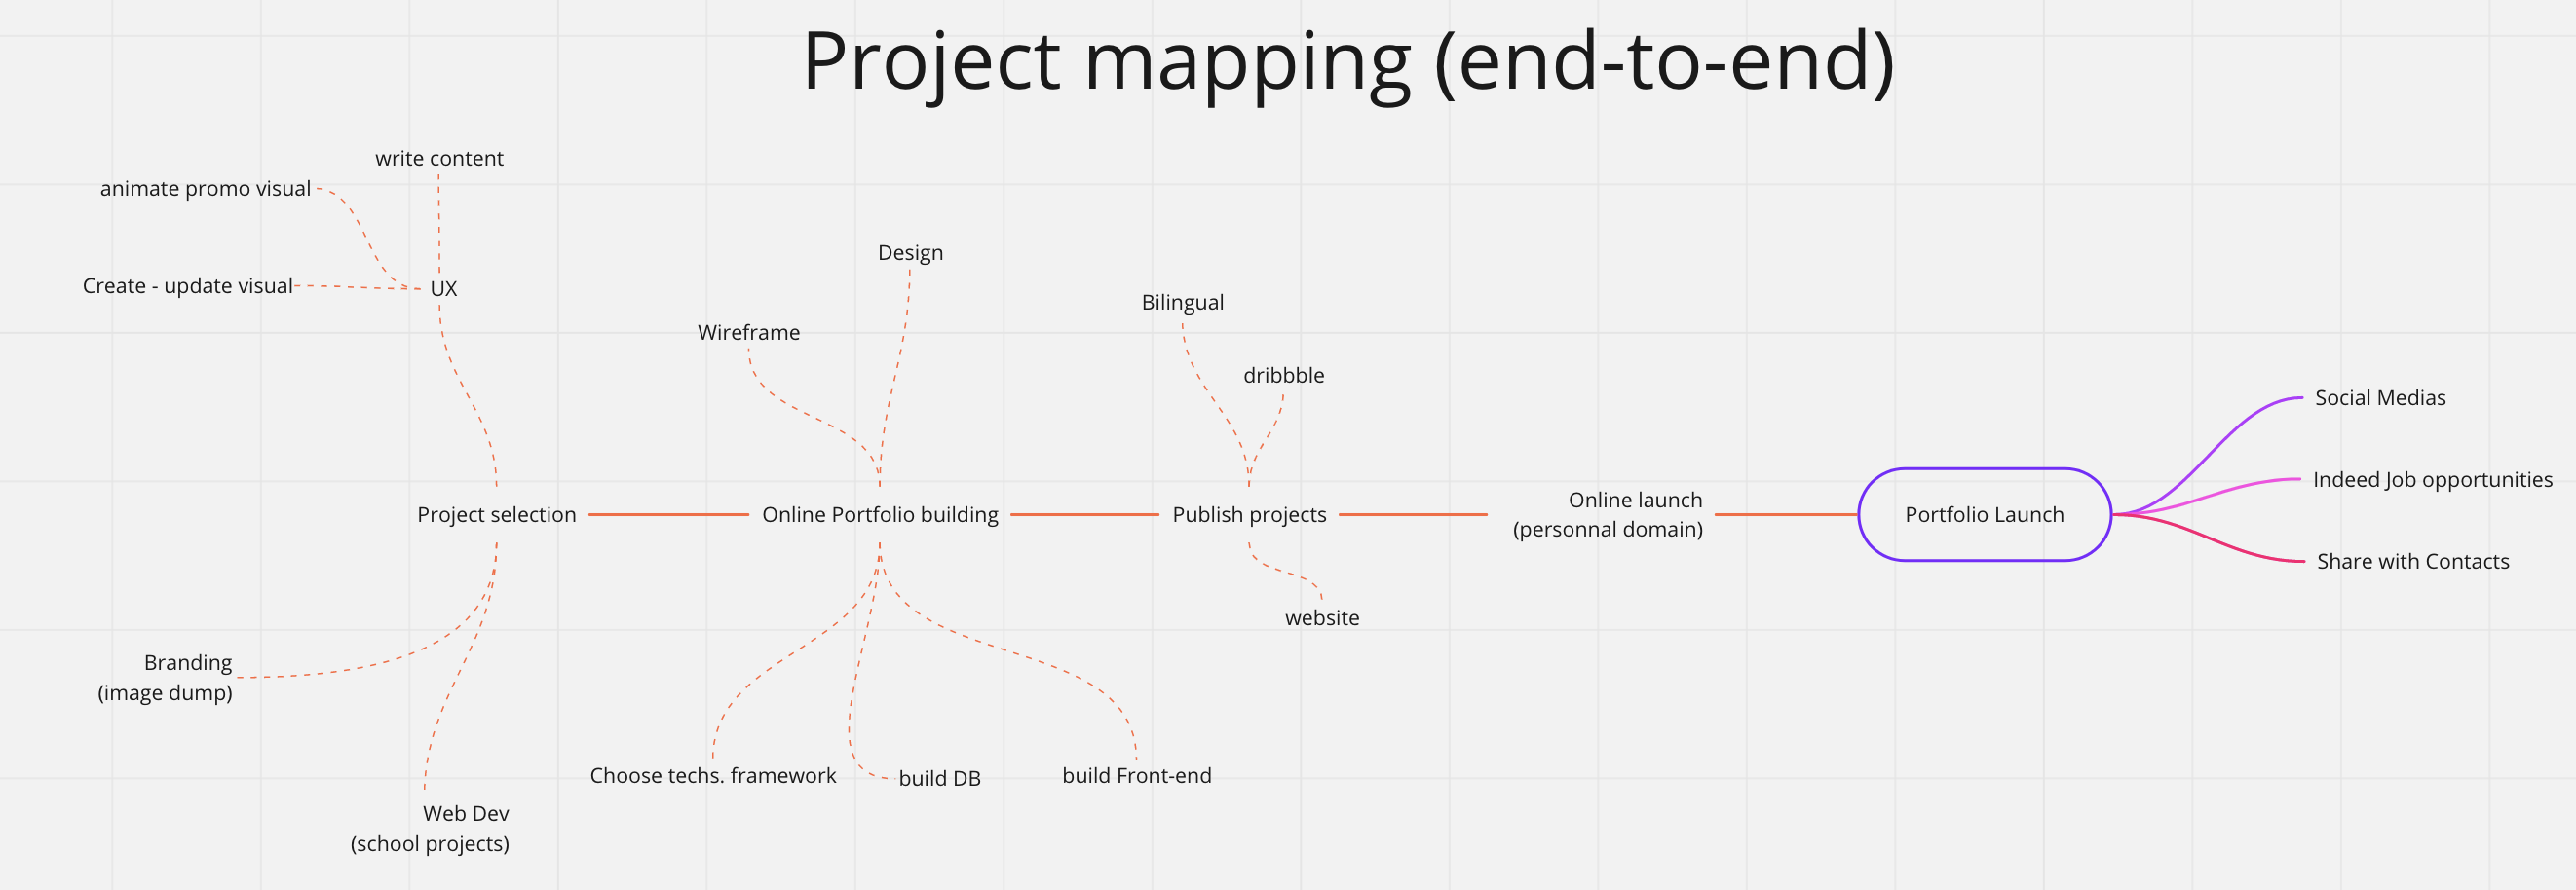
Step 1: Mind Mapping
I started this project with the end: Portfolio Launch.
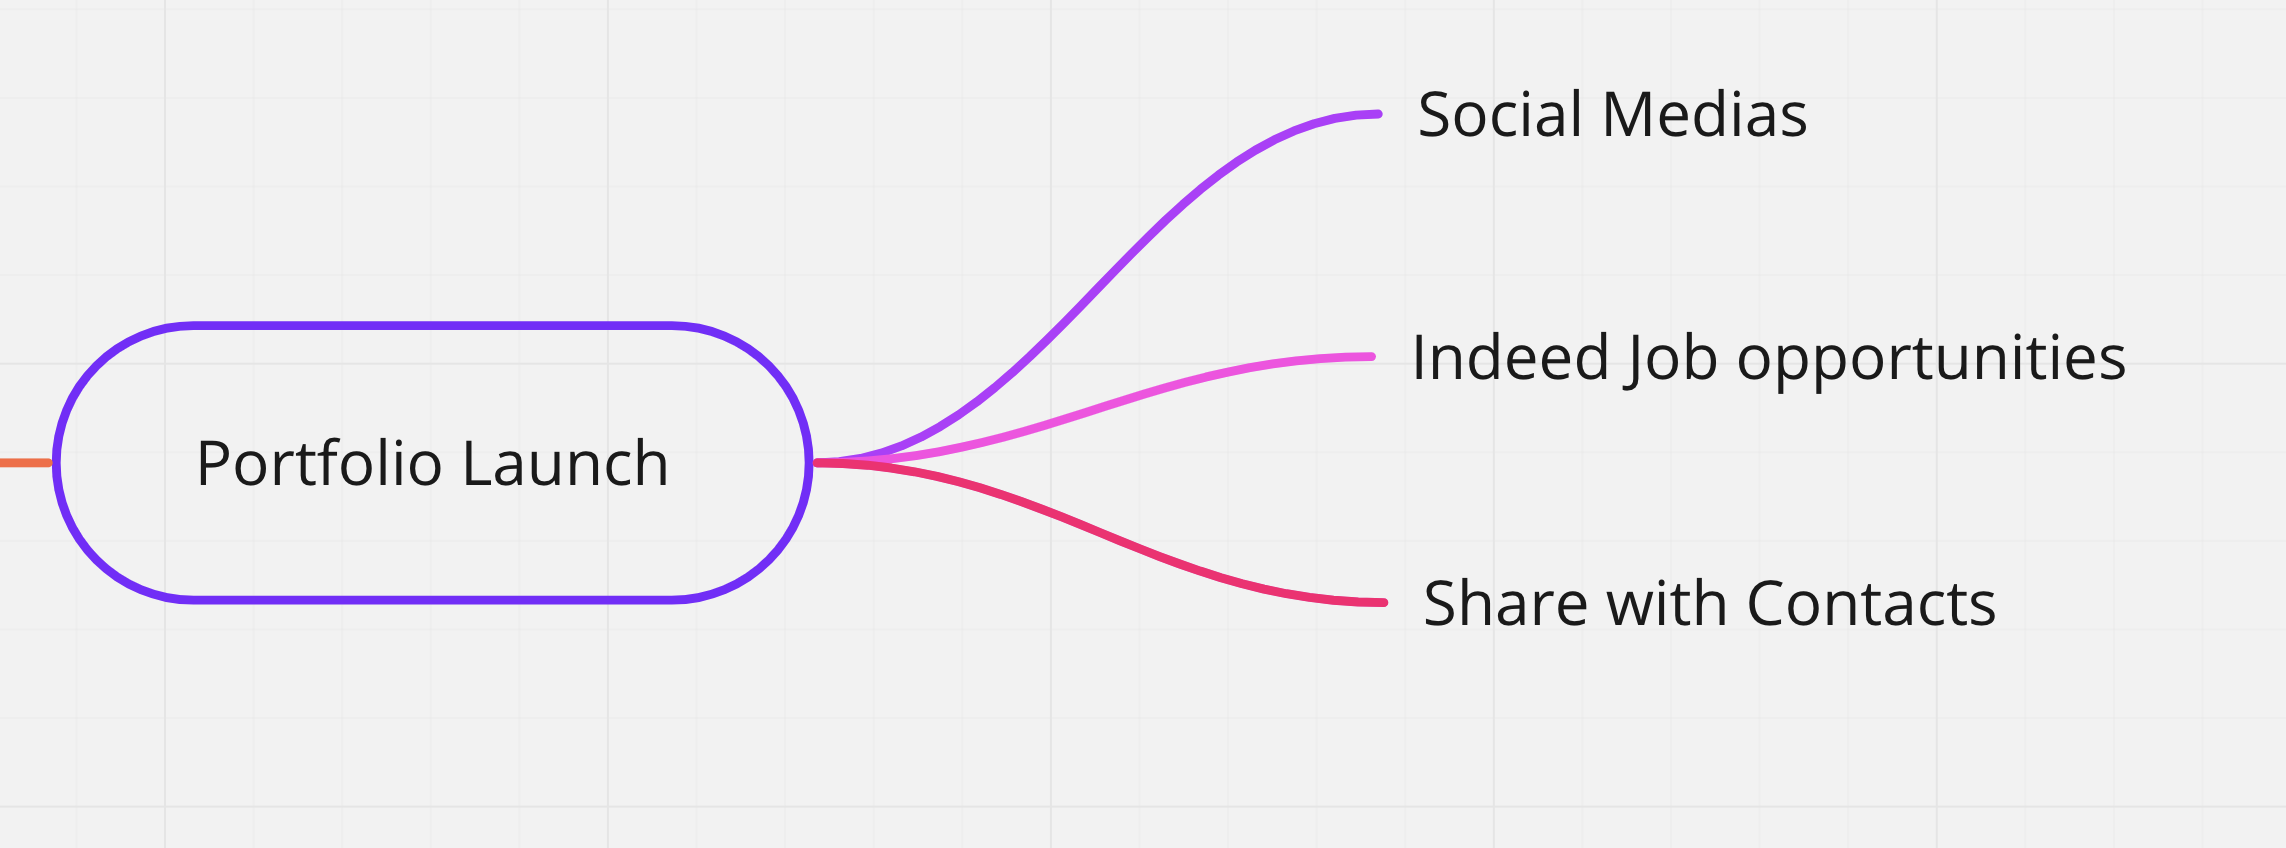
If you are reading this, It means that I've successfully made it to this point! Kudos to me.
Step 2: Agile Sprints
To make sure I was following my game plan, I've created an Azure DevOps Agile Board. It was one of my first experiences with this agile tool, as I am mostly used to JIRA or Trello.
Before diving into the design of my portfolio, I had to do some research on what I wanted to achieve with it and how I plan to build it.
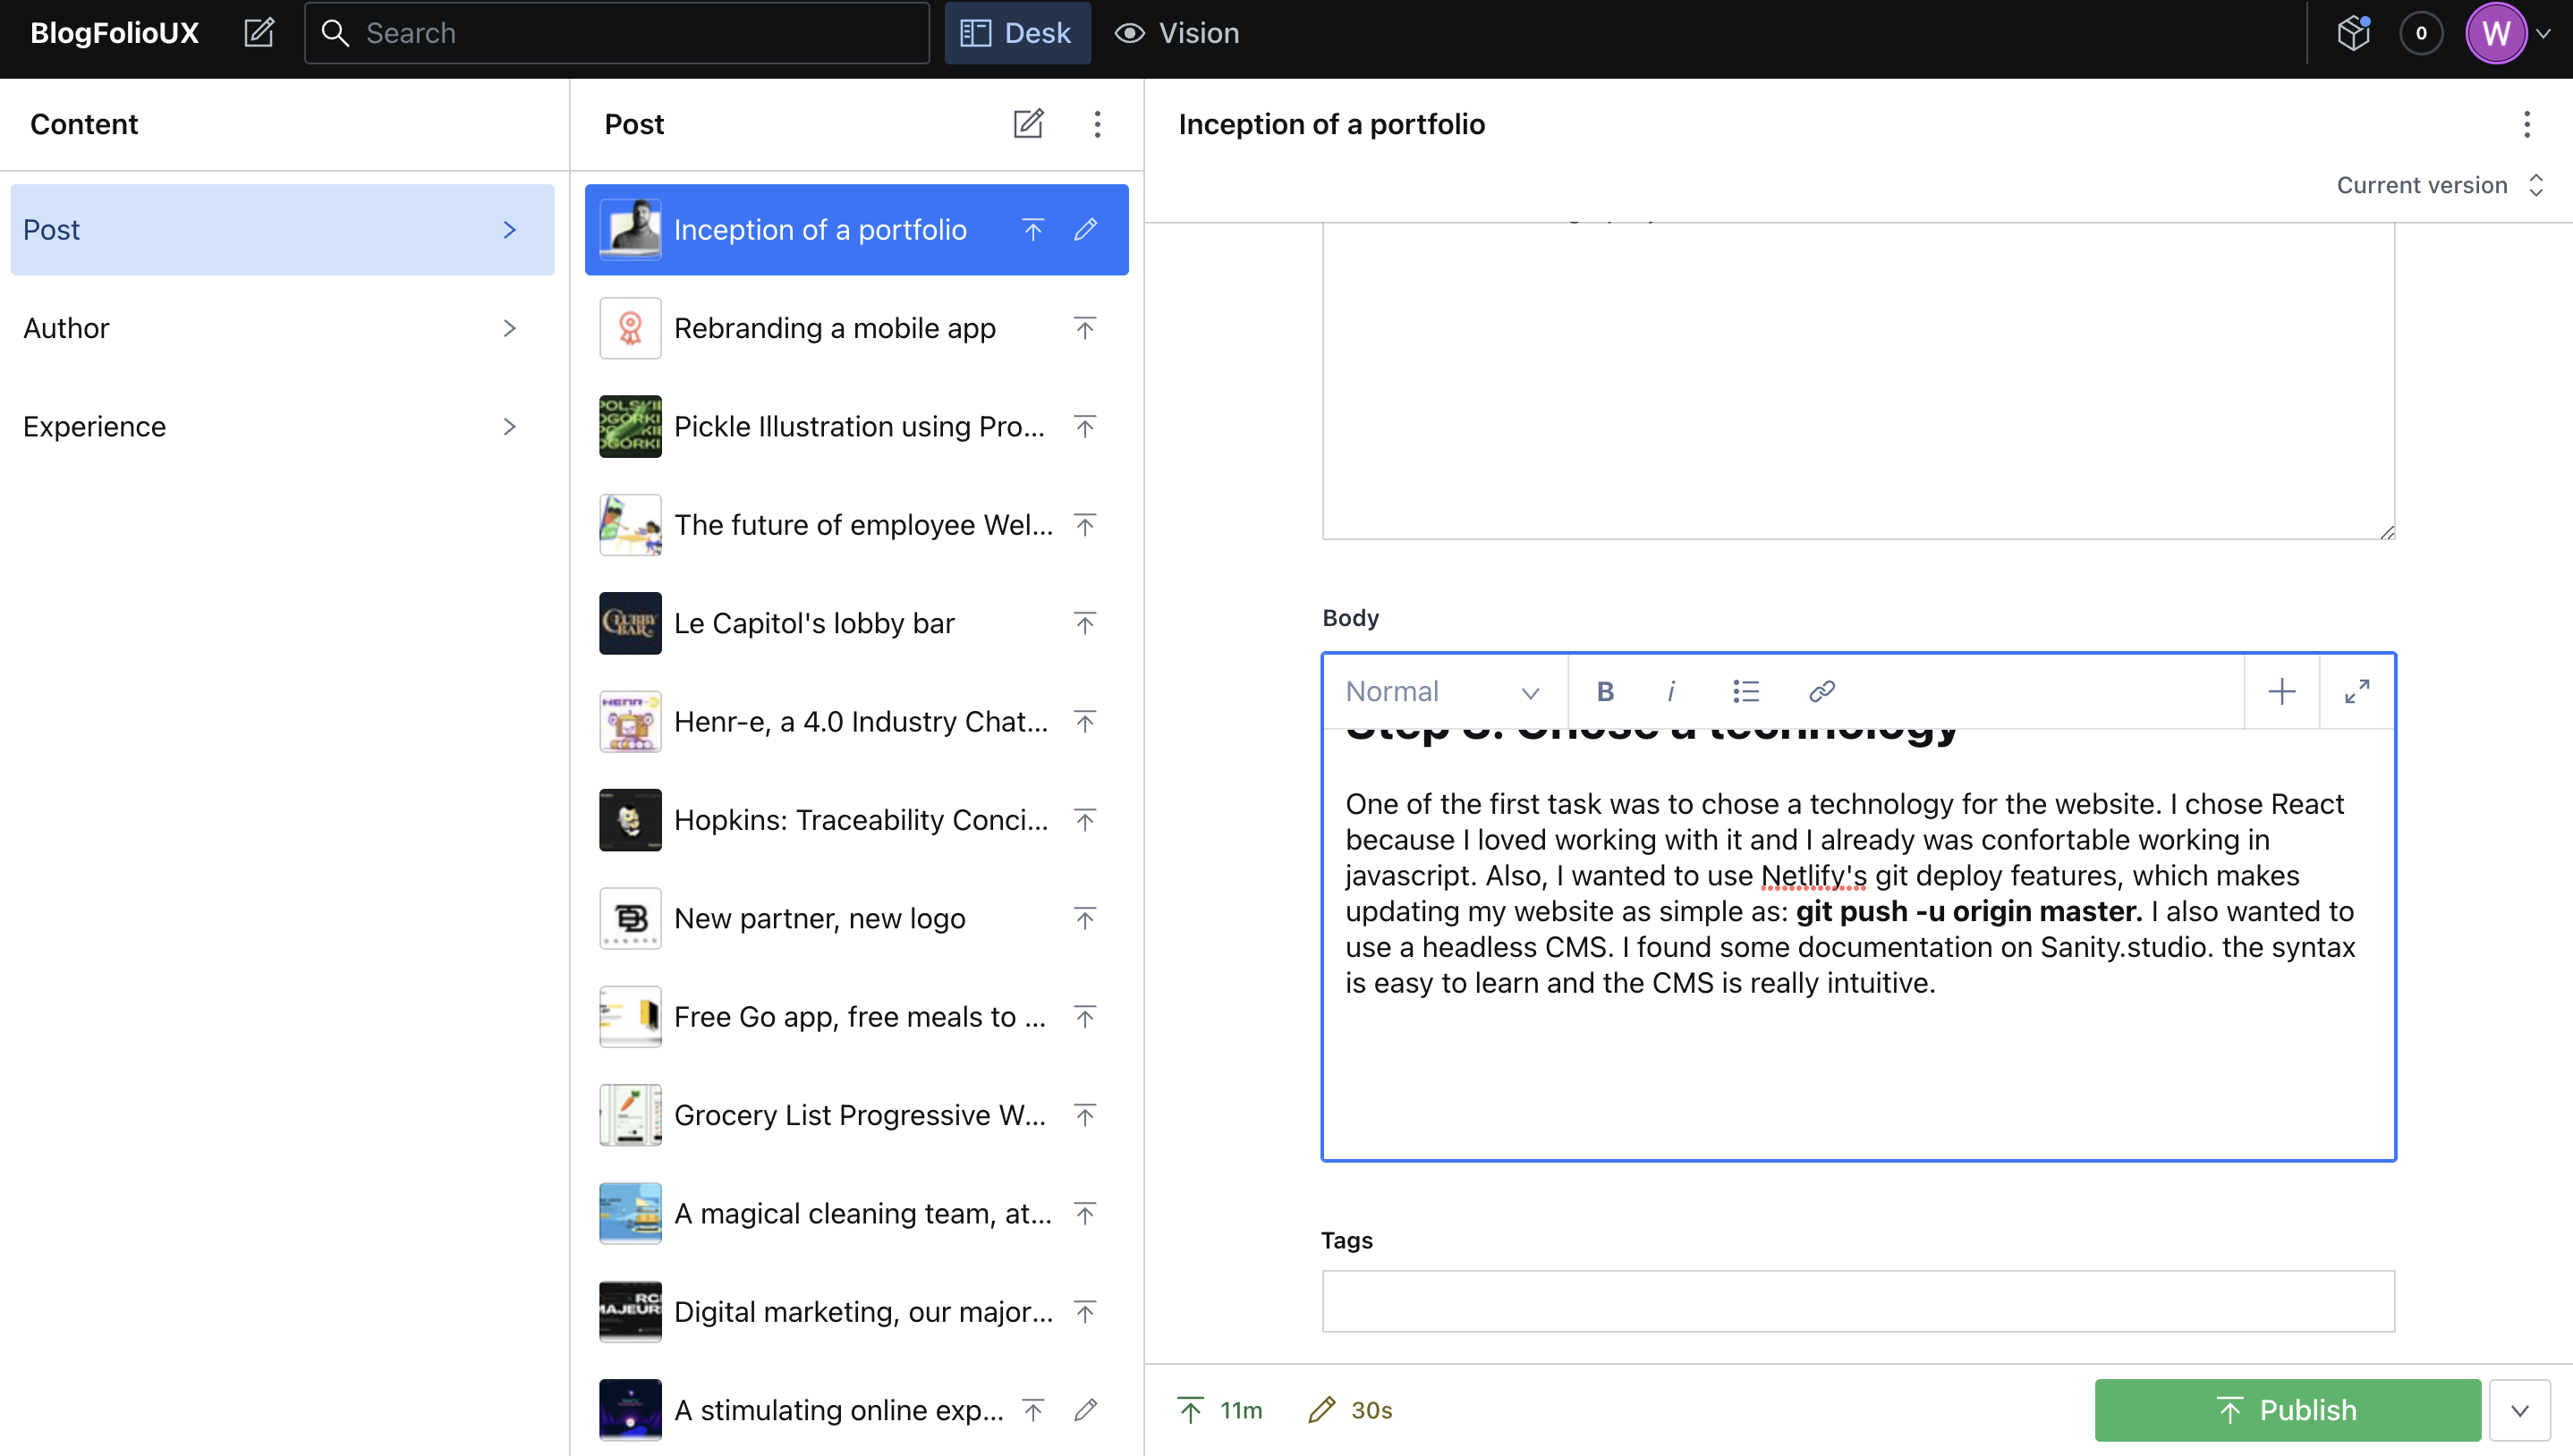
Step 3: Chose a technology
One of the first tasks was to choose a technology for the website. I chose React because I loved working with it and I already was comfortable working in javascript. Also, I wanted to use Netlify's Git deploy features, which make updating my website as simple as git push -u origin master. I also wanted to use a headless CMS. I found some documentation on Sanity. studio. the syntax is easy to learn and the CMS is intuitive.
Here's what it looks like:
Looks familiar? ;)
Step 4: Design
I already had begun the design of my portfolio. I wanted the visual to be simple and minimalist, in order to let the projects be the highlight of the site.

Step 5: Coding
As I stated previously, I chose to build my site using React and Sanity Studio. I also was curious about using a new framework for my CSS. I decided to try Tailwind CSS, since I was already familiar with Bootstrap. The learning curve was kind of too complicated for what I wanted to achieve. What I love the most about it, is the media queries. To specify a rule on a medium screen, it's as simple as writing:
className="flex flex-col md:flex-row".
It also features a way to purge any component you don't use. As someone who builds his own custom design, I think it's a bit too heavy to use. I learned about React Style Component while I was building my portfolio. Next time, I'll be using that.
Since my coding skills are not as good as my design skills, I had to adapt my design all along the process. I see this website as an MVP for my portfolio. Better done than perfect.
For example, here's a list of some of the next features I want to deploy:
- Add a French version of the website
- Better sorting of the projects
- Display Highlighted posts on the home page/ and Categories
- Add more animations and interactivity
- Add a contact form to the contact page
- Add a feature to add embedded code to my project page
- Replace Tailwind CSS to React Style Component using SASS
- Post a project in multiple categories
Step 6: Copywriting
This is the step I feared the most. Since I'm not a native English speaker, and I wanted to be able to share my portfolio with the world, I had to write in English. The amount of time it takes for every project is significant, but what scared me the most was not being able to display my work to its true value. I have so many sketches and former work situations that could have made great case studies, that I was afraid to miss some important pieces of information. As I stated before, better done than perfect.
Step 7: Job Seeking
This step is ongoing! Help me complete it by reaching out on LinkedIn , contact me by email, or giving me a call!

William Gauvin